
I decided to make taggy blankets! They were so fun and easy to make!
Supplies Needed:
Ribbon-I tried to get a variety of textures so that it kept the little one's attention
Fabric-I used cotton and minky but I have seen this with many other fabrics too. The possibilities are endless here.
Thread
Pins
Sewing Machine
If you are a crafter you might have all of this on hand and you wont have spend any money! I didn't have ribbon so I waited for it to go on sale at Michaels and then grabbed a bunch.
I started by cutting a 14"x14" square from each fabric.

Next, I cut strips of my ribbon. I did mine 7" long so that when they were folded over they were long enough to put fingers through/suck on.
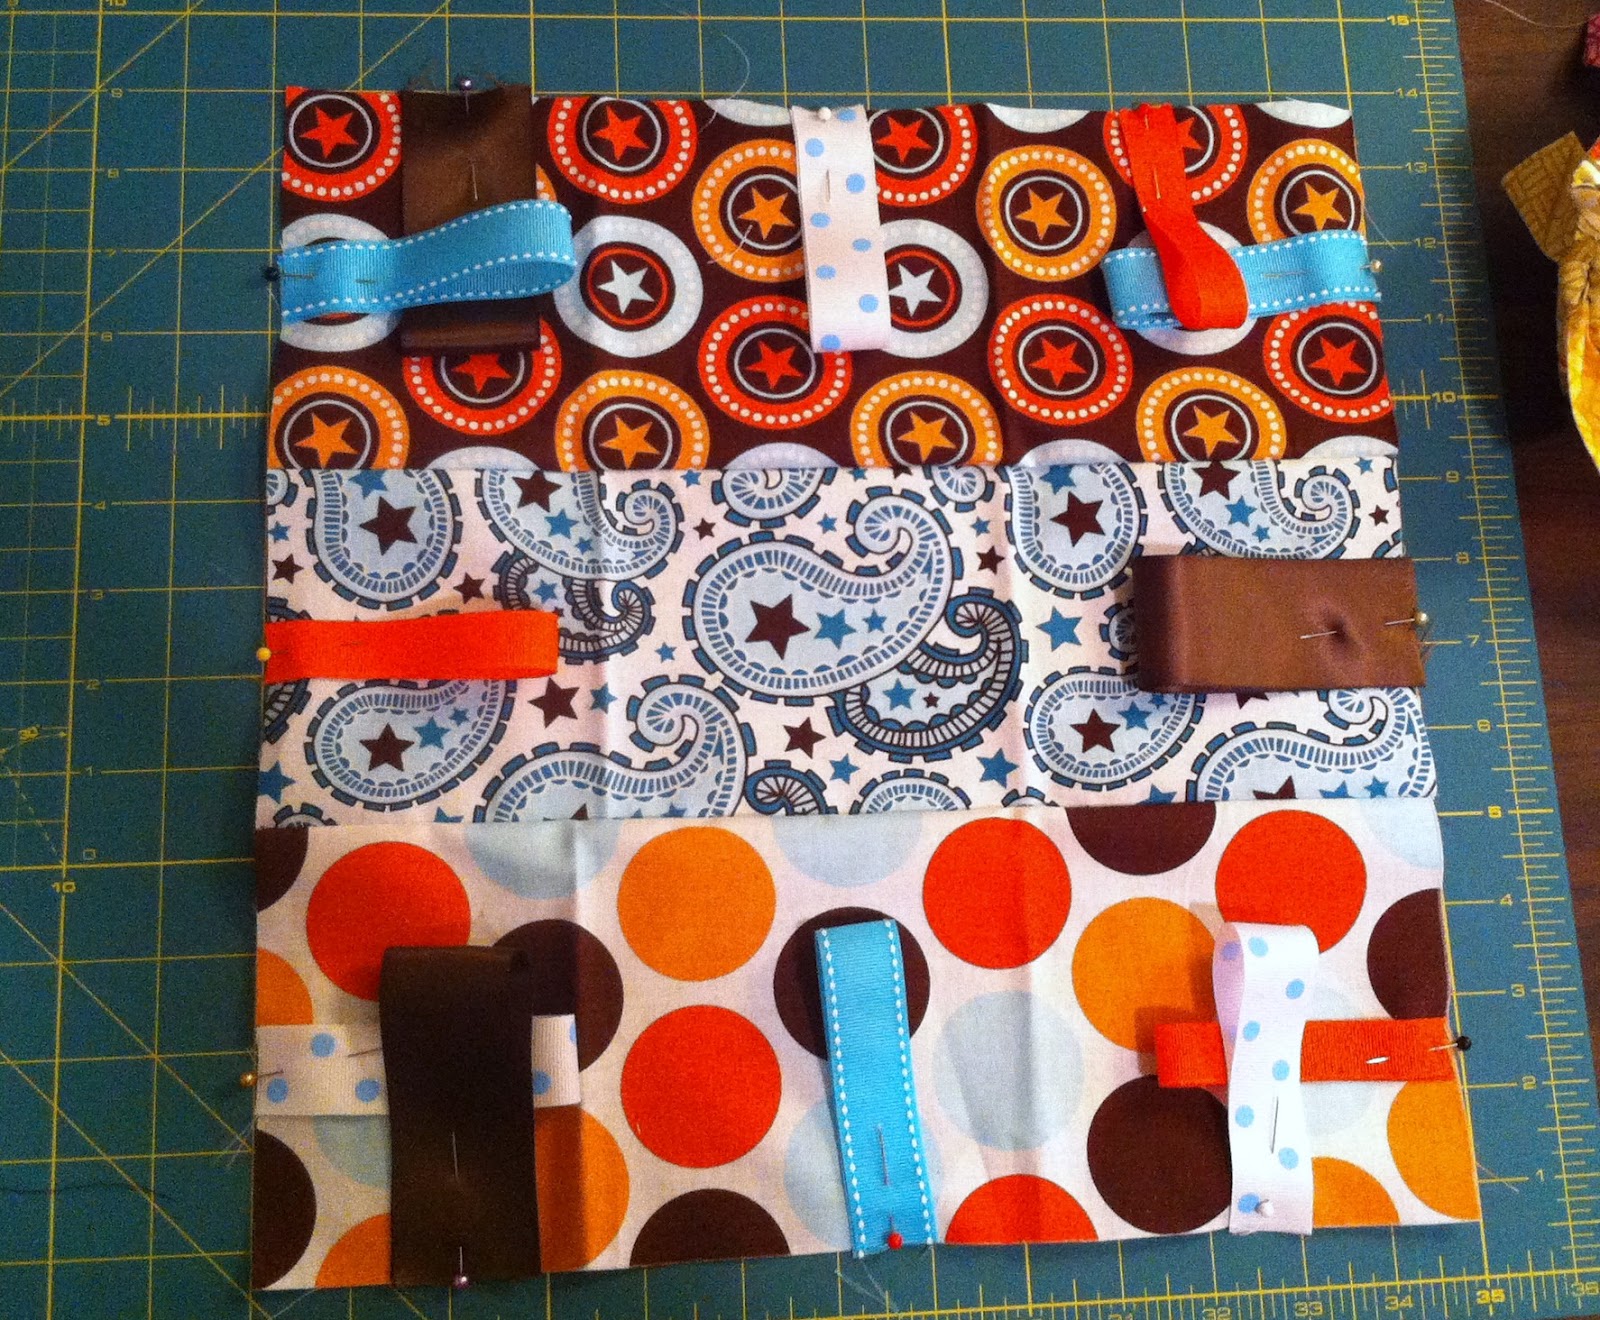
After your ribbon and fabric are cut, pin your ribbon to your fabric. I decided that three ribbons on each side looked the best and I just eyeballed where to put them. You want to fold the ribbon in half and pin the open ends to the fabric like the picture below.
I don't have a picture of the next step (sorry) but it isn't too difficult. Once you have your ribbon pinned on, pin the minky fabric piece to the one with the ribbons on it. You want to make sure that right sides are together.
Now it is time to sew! Start in one corner and sew all the way around the outsides of your two pieces of fabric. Minky can be pretty tricky to sew on so if you have a walking foot for your machine it might help. I didn't use one because this project was pretty small but I think it would have helped :) As you are sewing, you will want to check to make sure that you are catching each piece of ribbon and that the ribbon doesn't bunch up. PS don't forget to leave a small opening so that you can flip it all right side out!
Your finished project will look like this!!


Love the idea Heather. Definitely going to try it out. Thanks! :)
ReplyDeleteI just have to say that Jaevin loves the blankie that you made for him! Can you believe it's been 2 years?! He still sleeps with it every night and drags it around with him. It is his special blankie and won't sleep without it. I think you've got the touch :)
ReplyDelete